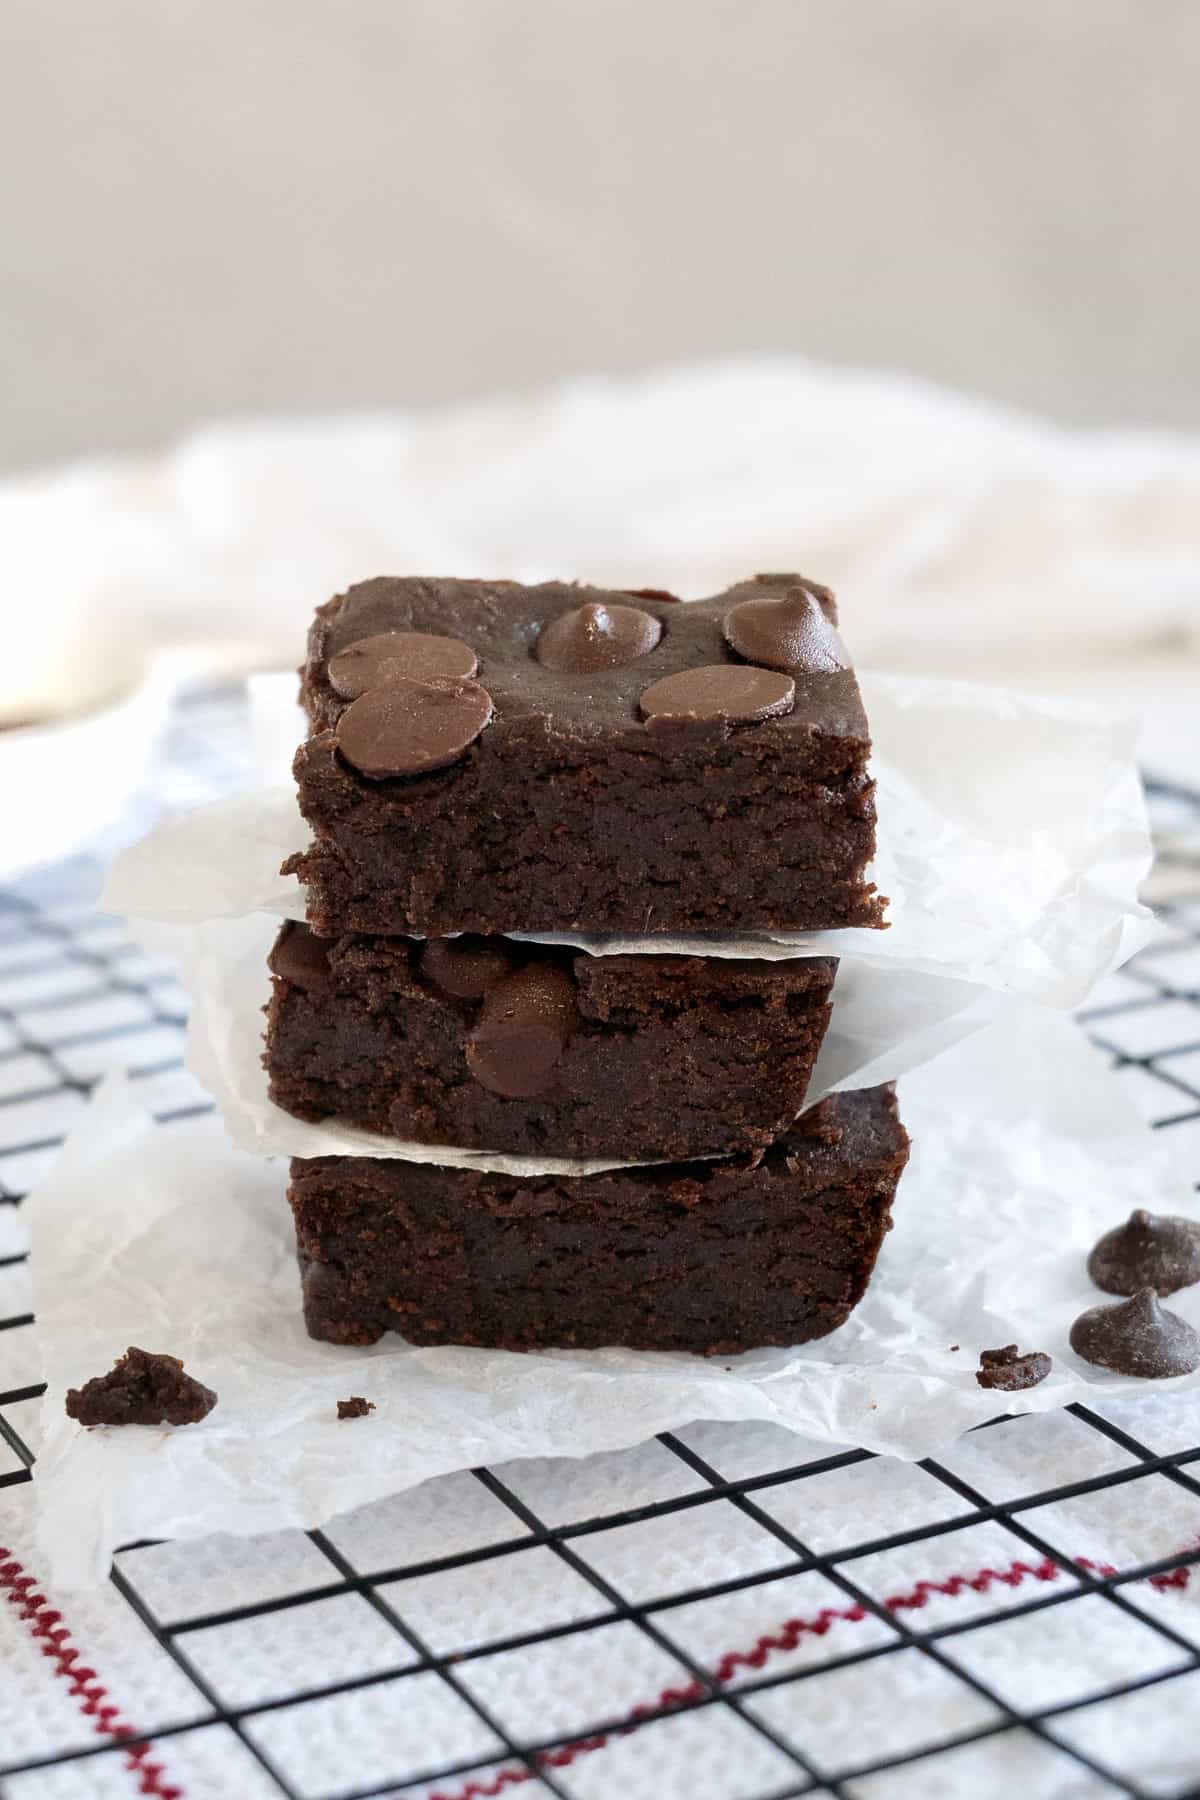
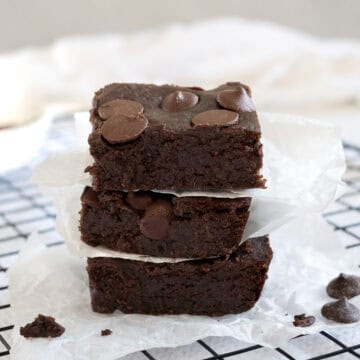
These chickpea brownies will leave everyone guessing how you made them. The chickpeas are not detectable and there is no flour in this recipe whatsoever. These brownies have the most indulgent fudginess.
When I was asked to help a reader create chickpea brownies, my curiosity was immediately piqued.
Chickpeas in brownies, hmmm.
Well, lo and behold, these chickpea brownies are incredible. Fudginess is a 10 out of 10, the level of sweetness is bang on, and I really love that I made them without any flour, which feels lighter on the gut.
If you're a fellow brownie lover and like the boxes this recipe ticks, naturally plant-based (vegan) and flourless (gluten-free), you will definitely want to make my sweet potato brownies. They have that cakey brownie texture you're after, trust me, you won't be disappointed.
Flavor Profile
If you're wondering what these chickpea brownies taste like, they are deeply fudgy, rich in chocolate, and naturally sweetened with dates and maple syrup - making them not sickly sweet.
The peanut butter adds a subtle nutty warmth in the background without overpowering the chocolate. You would never guess chickpeas are the base.
Ingredients
The complete list of ingredients with measurements, can be found in the full recipe card below.
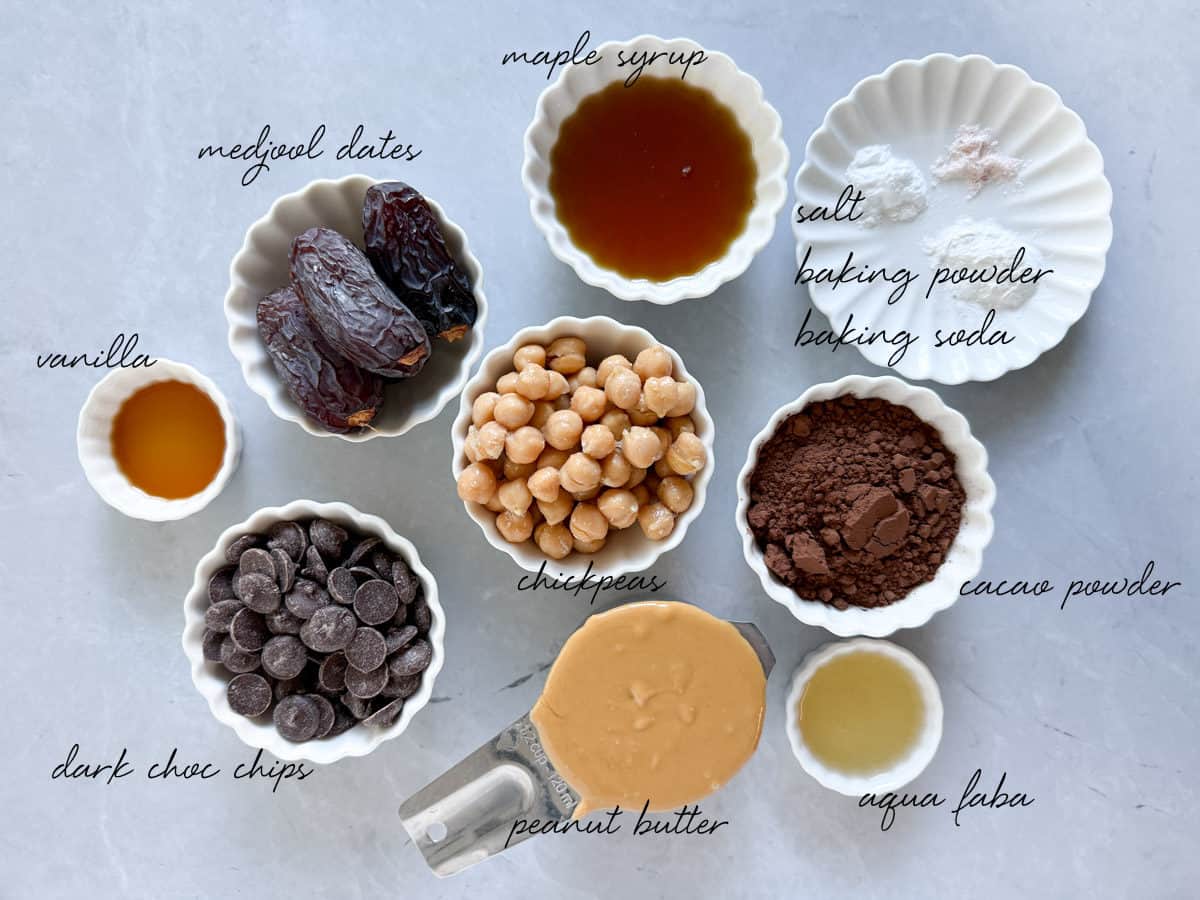
The star here is chickpeas, blended completely smooth until they disappear into the batter. Use canned chickpeas and don't rinse them, just drain and keep that liquid aside. That reserved liquid is aquafaba, and a tablespoon of it goes straight into the batter to keep the dough from turning too dry. It also doubles as a natural binder, doing the job an egg would in a traditional brownie.
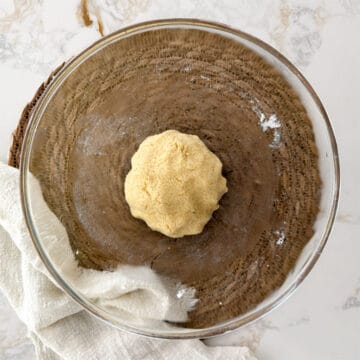
Peanut butter is the second pillar, smooth and well-stirred for the easiest blending. Medjool dates and maple syrup work together as the sweetener, with the dates adding moisture and natural caramel notes. If your dates are a little dry or stiff, soak them in warm water for 10 minutes before blending, draining excess water. If you do this, hold off adding the aquafaba as the batter should be stiff, see below pic.
Blend, Spread and Bake
The full set of instructions are found in the below printable recipe card.
- Blend the ingredients in stages, as instructed in the recipe card below.
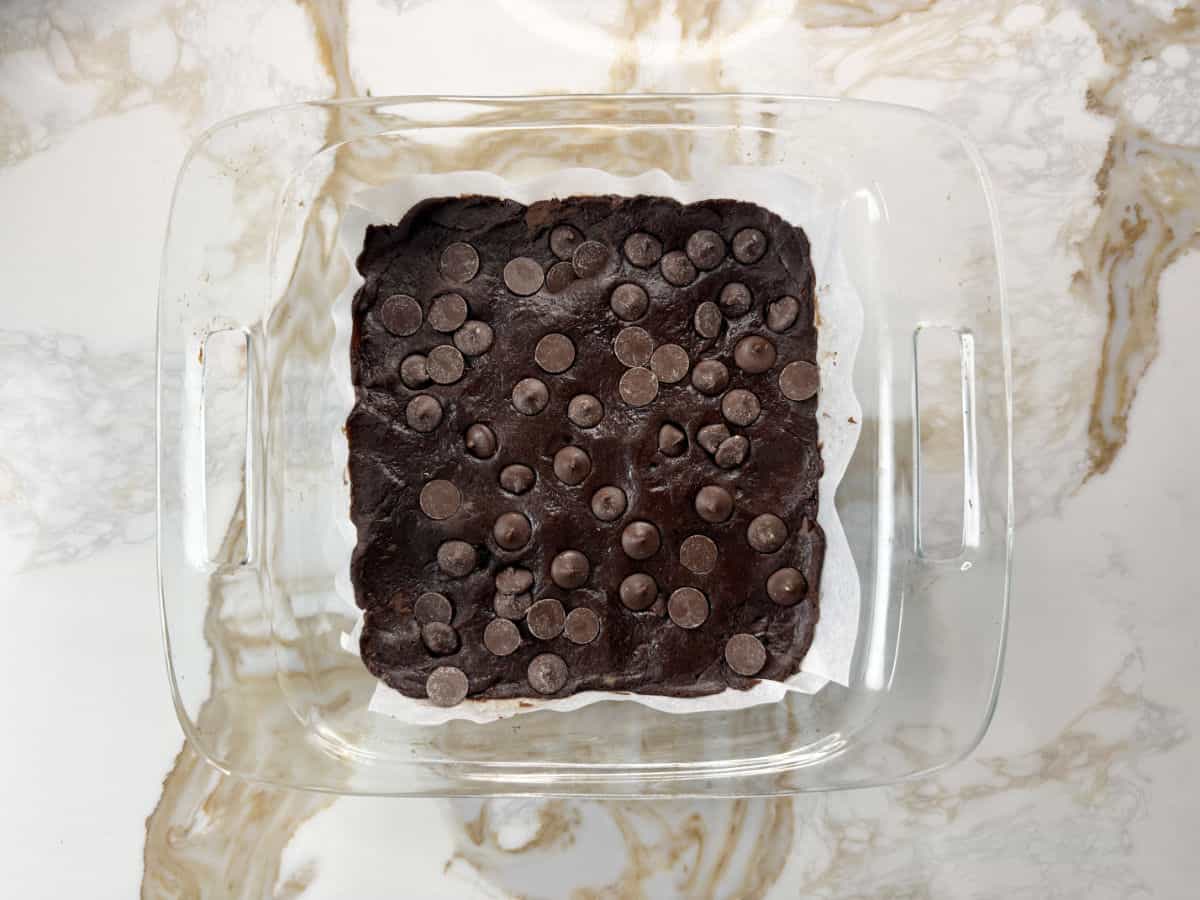
- Spread the batter into a lined 8x8" pan and top with the remaining chocolate chips.
Janelle's Tips
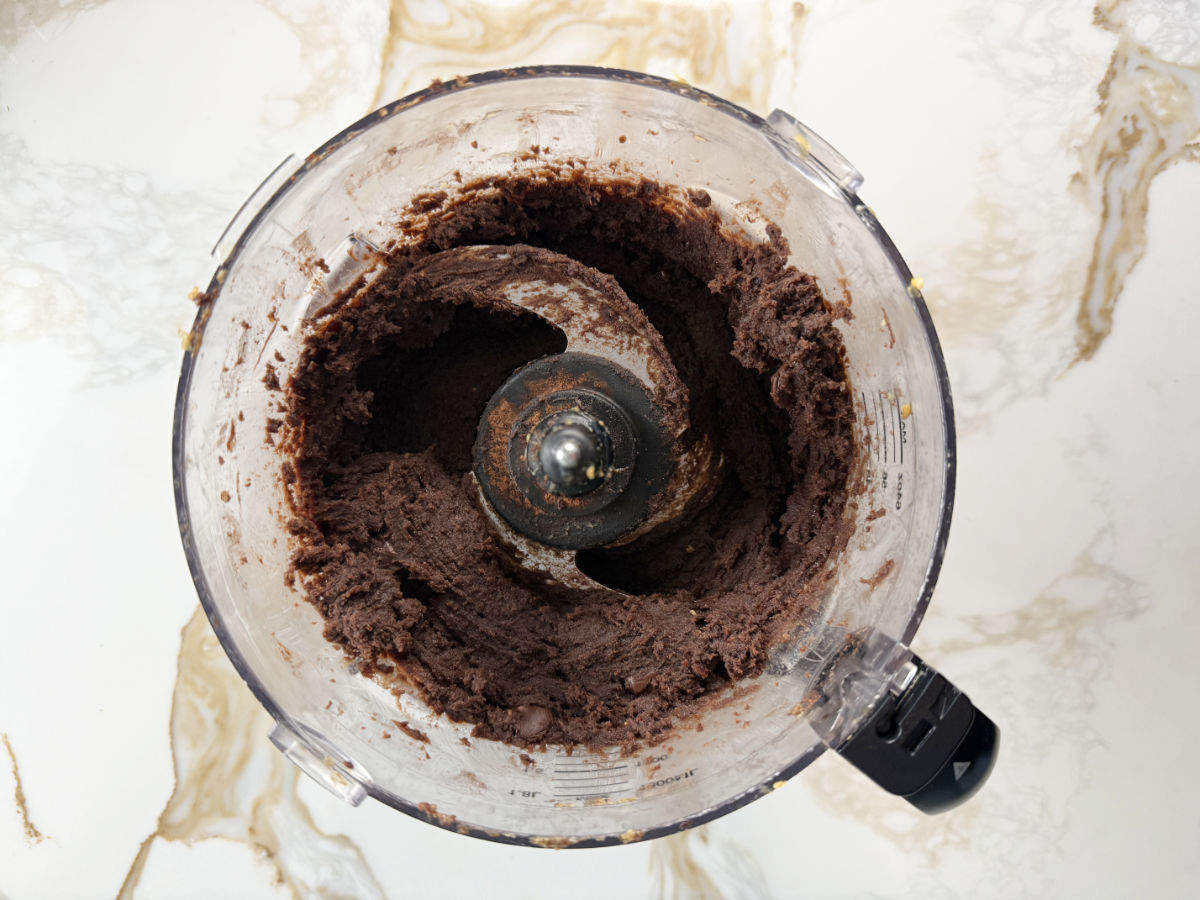
- The batter is thicker than a typical brownie batter, closer to a cookie dough texture, yet denser. That's exactly right, don't be tempted to thin it out.
- Chickpeas must be blended completely smooth, or the brownies will have a grainy texture. Blend longer than you think you need to.
- The toothpick test doesn't work well here. Go by the edges setting and the top losing its gloss.
- These must cool completely in the pan before slicing, or they will fall apart.
What I Use to Make This Recipe
 Buy Now →
  Buy Now →
  Buy Now →
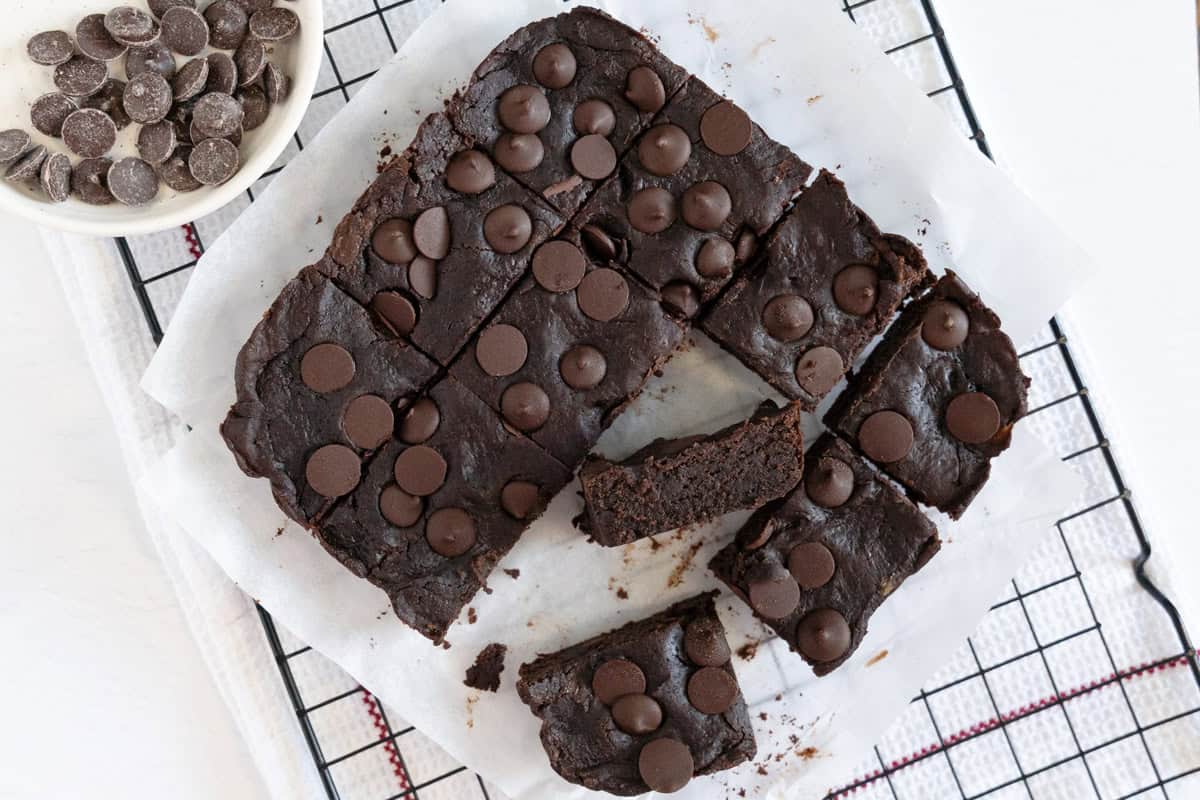
Did you make this? I'd love to know! Leave me a comment below with a ★★★★★ star rating or tag @plantbasedfolk on social media.
Recipe
Chickpea Brownies
Ingredients
- 1 can Chickpeas drained, liquid reserved, not rinsed
- ½ cup Smooth peanut butter 100% peanuts only
- 4 jumbo Medjool dates pitted, ~100g
- 3 tablespoon Maple syrup
- 1 tablespoon Aquafaba reserved chickpea liquid
- ¼ cup Cocoa powder aka cacao powder
- 1 teaspoon Vanilla extract
- ½ teaspoon Baking powder
- ¼ teaspoon Baking soda aka bicarb soda
- 1 pinch Salt
- ½ cup Dark chocolate chips divided
Instructions
- Preheat a fan-forced oven to 350°F (175°C). Line an 8x8 inch baking pan (20x20cm) with parchment paper.
- Add chickpeas, peanut butter, dates, and maple syrup to a food processor. Blend until completely smooth, with no lumps. Scrape down the sides as needed.Add cocoa powder, vanilla, aquafaba, baking powder, baking soda, and salt. Blend again until fully combined, scraping down the sides as needed.Pulse in half the chocolate chips in short bursts.
- Spread the batter evenly into the prepared pan using the back of a spatula. Scatter the remaining chocolate chips on top and press down gently.
- Bake for 20 minutes in the middle of the oven, until the edges are set and the top has lost its glossy sheen. Do not overbake, they firm up as they cool.
- Cool completely in the pan before slicing into 12 squares.
Video
Notes
Nutrition
N.B., nutrition info is an estimate based on an online nutrition calculator. This will vary based on the specific ingredients you use.

Comments
No Comments